


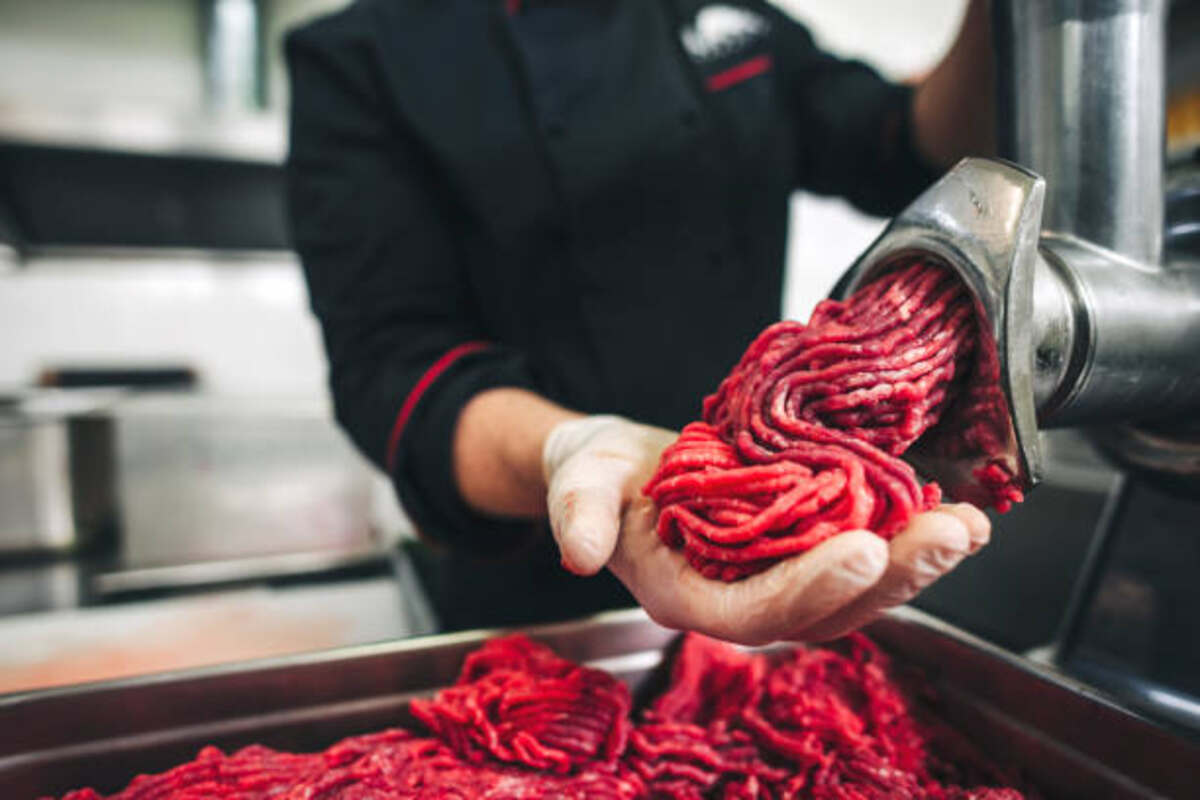
Choosing the Right Meat Grinder for You
A meat grinder is one of those kitchen tools that looks straightforward until you start comparing models. Then the questions arrive in a parade.
Manual or electric? Small attachment or dedicated machine? Fine plate, coarse plate, sausage tube, stainless steel, cast aluminum, half-horsepower, reverse function, dishwasher-safe parts, commercial certification… suddenly you are not buying a grinder. You are decoding a small but mighty piece of butchery equipment.
Let us make it simple.
The best meat grinder for you is not automatically the biggest, loudest, shiniest, or most expensive one. It is the grinder that matches your actual cooking life: how often you grind, how much meat you process, what texture you want, how much cleaning you will tolerate, and how safely the machine fits into your kitchen routine.
This tutorial walks you through the decision step by step. By the end, you will know what to look for, what to ignore, and how to choose with confidence.
Start With the Real Question: What Will You Grind?
Before you compare motors or accessories, define the job.
A grinder used for two pounds of burger meat once a month has a very different mission from a grinder used for venison processing, weekly sausage making, or restaurant prep. Most buying mistakes happen because people shop for the fantasy version of their kitchen instead of the honest one.
Ask yourself:
- How often will I use it?
- How many pounds will I grind in one session?
- Am I grinding mostly beef, pork, poultry, venison, lamb, or mixed meats?
- Do I want burgers, meatballs, chili grind, sausage, pâté-style textures, or pet food prep?
- Do I need sausage stuffing capability, or only grinding?
- Do I have counter space for a dedicated unit?
- Do I have storage space for the body, plates, blades, tubes, and tray?
- Will I clean it immediately after every use?
That last question matters. A grinder is not a toss-it-in-a-drawer gadget. It touches raw meat, fat, connective tissue, and sometimes spices. It needs careful cleaning, drying, and storage after each session.
The quick match
If you grind small batches occasionally, consider:
- A manual grinder
- A stand mixer grinder attachment
- A compact electric grinder
If you grind several pounds at a time, consider:
- A dedicated electric grinder
- A larger home-processing model
- A unit with metal gears and a larger feed tray
If you process game, make sausage often, or grind in larger seasonal batches, consider:
- A heavy-duty electric grinder
- A larger throat size
- Multiple plates
- A reverse function
- Strong replacement-parts availability
If you operate in a commercial kitchen, look for equipment that meets the sanitation and electrical expectations required for your setting. NSF develops and certifies food equipment standards for restaurant and commercial kitchen use, so commercial buyers should check certification requirements rather than relying on home-use marketing language. (nsf.org)
Step 1: Choose the Grinder Type
There are four broad categories: manual grinders, stand mixer attachments, dedicated electric grinders, and commercial-style grinders. Each has a personality. Choose the one whose personality does not annoy you.
Manual meat grinders
Manual grinders are hand-cranked. They are simple, affordable, and satisfying in a very old-school way. You clamp the grinder to a table or counter, feed the meat into the hopper, turn the handle, and watch the grind emerge.
A manual grinder can be a smart choice if:
- You grind only small batches
- You want a low-cost entry point
- You do not want another electric appliance
- You like tools that are easy to understand mechanically
- You have patience and arm stamina
But a manual grinder is not ideal if:
- You process large amounts of meat
- You have limited hand or shoulder strength
- You need speed
- You dislike clamping tools to a surface
- You plan to make sausage regularly
Guru tip: A manual grinder is charming for occasional use, but charm fades fast when you are standing over ten pounds of half-frozen pork shoulder and your arm starts negotiating with your soul.
Stand mixer grinder attachments
If you already own a compatible stand mixer, a grinder attachment can be appealing. It saves space, uses the mixer motor, and gives you a gentle introduction to home grinding.
This may be right for you if:
- You already own the mixer
- You grind small to moderate batches
- You want one appliance base to do multiple jobs
- You are learning before investing in a dedicated grinder
Watch for:
- Attachment material
- Whether parts are dishwasher-safe
- Feed tube size
- Replacement plate availability
- How well the mixer handles chilled meat and fat
Stand mixer attachments are convenient, but they are not always the smoothest choice for large batches. If you already know you want to make sausage often, you may outgrow an attachment quickly.
Dedicated electric meat grinders
This is the sweet spot for many home cooks. A dedicated electric grinder is built for one purpose: moving meat through an auger, blade, and plate with consistent force.
Choose a dedicated electric grinder if:
- You grind regularly
- You want better speed and consistency
- You process larger batches
- You want more plate options
- You value a stable hopper and larger feeding area
- You want the grinder to do the work instead of your arm
Common features to compare include:
- Motor strength
- Gear material
- Feed tube size
- Plate sizes included
- Reverse function
- Noise level
- Weight and stability
- Ease of disassembly
- Replacement part availability
A good electric grinder can turn home meat prep from an ambitious project into a repeatable routine.
Commercial-style grinders
Commercial-style grinders are built for frequent, heavier use. They are usually larger, heavier, faster, and more durable than home units.
Consider this route if:
- You process game meat in bulk
- You make sausage in serious quantities
- You run a food business
- You need speed and durability
- You value repairability and replacement parts
The tradeoffs are real:
- Higher cost
- More storage space
- More weight
- More cleaning responsibility
- More machine than a casual cook needs
The best meat grinder is the one that serves your real volume. Buying too small is frustrating. Buying too large can be expensive overkill.
Step 2: Match Grinder Size to Your Batch Size
Grinder size is often described by numbers such as #5, #8, #12, #22, and #32. These sizes generally relate to the grinder head and plate system. Larger numbers usually mean a larger throat, larger plate, and greater processing capacity.
You do not need to memorize every grinder size. You only need to match the size to your workload.
For occasional burgers and meatballs:
- A smaller grinder or attachment may be enough
- Look for easy cleanup over raw power
- Prioritize storage convenience
For frequent home use:
- A mid-size electric grinder is often more comfortable
- Look for sturdy metal components
- Choose a model with fine and coarse plates included
For game processing or large sausage batches:
- A larger grinder can save time and reduce frustration
- Look for stronger motors and durable gears
- Confirm replacement knives and plates are easy to find
For business use:
- Check local requirements
- Verify certification and electrical compatibility
- Choose serviceable equipment with documentation
One of the best meat grinder tips is this: do not buy only for your smallest batch. Buy for the batch you will make when you are tired, hungry, and wishing the job were already done.
Step 3: Understand Motor Power Without Getting Distracted
Motor power matters, but it is not the whole story.
Some product listings emphasize peak watts, locked motor watts, or dramatic power claims. Those numbers can be tempting, but practical performance depends on more than the headline wattage.
Look at the whole machine:
- Does it maintain speed under load?
- Does it have metal gears or plastic gears?
- Does it overheat during longer sessions?
- Is the feed throat wide enough for your prep style?
- Is the blade sharp and properly matched to the plate?
- Does the manufacturer provide realistic use instructions?
- Can you buy replacement parts?
A grinder with moderate power and excellent cutting parts may perform better than a louder machine with a weak blade and poor fit.
What reverse function does
A reverse function helps clear minor jams by briefly moving the auger backward. This can be useful when sinew, silver skin, or dense fat slows the grinder.
But reverse is not magic. If meat is smearing, clogging, or coming out warm and mushy, the issue may be:
- Meat is too warm
- Fat is too soft
- Blade is dull
- Plate is clogged
- Grinder is assembled incorrectly
- Pieces are too large
- Sinew was not trimmed
- The machine is being overloaded
Reverse is helpful. Good prep is better.
Step 4: Learn the Plate System
The plate controls the final texture. It is the round disk with holes that the meat passes through after the blade cuts it. Smaller holes produce a finer grind. Larger holes produce a coarser grind.
Common plate categories include:
- Fine plates for smooth textures
- Medium plates for burgers, meatballs, and many sausages
- Coarse plates for chili meat, rustic sausage, first grinds, and chunkier texture
Manufacturer plate guides vary, but LEM’s grinder plate guidance lists examples such as 3 mm for hamburger, bologna, hot dogs, and jerky; 4.5 mm for coarse hamburger and regular sausages; 6 mm for coarse sausages; 10 mm for first grind, chili, chorizo, and linguisa; and 12 mm for first grind, coarse chili, and stew-style applications. (everythingkitchens.com)
That does not mean you must follow those pairings like scripture. Think of them as texture landmarks.
Fine grind
Use a fine plate when you want:
- Smooth burger blends
- Meatloaf with a tighter texture
- Emulsified-style sausage prep
- Pâté-like texture
- A second pass after a coarse grind
Fine plates create more resistance. That means the grinder works harder, especially if the meat is warm or sinewy.
Medium grind
Use a medium plate when you want:
- Everyday burgers
- Meatballs
- Meat sauce
- Breakfast sausage
- General-purpose ground meat
If you are unsure where to start, a medium plate is usually the friendly middle ground.
Coarse grind
Use a coarse plate when you want:
- Chili grind
- Rustic sausage
- Visible meat texture
- First pass before a finer second grind
- Meat that still has chew and structure
Coarse plates are excellent for first-pass grinding because they move meat through quickly and reduce smearing.
Should you grind once or twice?
It depends on texture.
Grind once if:
- You want a loose, rustic texture
- You are making chili grind
- You are using a coarse plate
- You want minimal handling
Grind twice if:
- You want a more uniform blend
- You need better fat distribution
- You are making sausage
- You want a finer burger texture
A classic approach is to grind once through a coarse plate, chill the meat again, then grind through a medium or fine plate. This is one of those grinding tips that improves texture quickly because the first pass does the heavy work and the second pass refines.
Step 5: Evaluate the Blade and Plate Quality
The grinder blade and plate are a matched pair. The auger pushes meat forward, the blade cuts it, and the plate sets the texture. If the blade is dull or the plate is poorly fitted, the meat can smear instead of cut.
Good signs:
- Blade sits flush against the plate
- Plate is flat and smooth
- Cutting edges feel sharp, not rounded
- Parts fit tightly without wobble
- Replacement blades and plates are sold separately
Warning signs:
- Meat looks crushed or pulpy
- Fat smears instead of cutting cleanly
- Grinder heats up quickly
- Meat backs up in the feed tube
- You must force the pusher aggressively
- The blade or plate rusts easily after normal cleaning
Guru tip: Grinding is cutting, not squeezing. When the cut is clean, the texture is clean. When the cut is dull, the grinder becomes a meat press with ambition.
Step 6: Decide Which Materials Make Sense
Grinders may use stainless steel, cast aluminum, plastic, coated metal, or a combination of materials.
Stainless steel
Stainless steel is durable, corrosion-resistant, and easy to clean when properly designed. It is often preferred for serious home use and commercial settings.
Look for stainless steel in:
- Grinding head
- Auger
- Plates
- Blade
- Meat tray
- Housing, if durability matters
Cast aluminum
Cast aluminum is common in grinder attachments and some home units. It can be lightweight and affordable, but check cleaning instructions carefully. Some aluminum parts are not dishwasher-safe and can discolor or oxidize if washed improperly.
Plastic components
Plastic is not automatically bad. A plastic pusher, tray cover, or accessory can be perfectly useful. But high-stress parts should be sturdy. If the auger, gears, or locking mechanisms feel flimsy, think twice.
Gear construction
A grinder may advertise a strong motor, but gear durability affects performance over time. Metal gears are often preferred for heavier use. If the manufacturer does not clearly describe internal components, assume the unit is designed for lighter work unless reviews and documentation prove otherwise.
Step 7: Think About Cleaning Before You Buy
Cleaning is not the glamorous part, but it is the part that determines whether you will actually use the grinder again.
A grinder that is miserable to clean becomes a museum piece in your cabinet.
Before buying, check:
- How many parts must be disassembled?
- Are the parts easy to remove?
- Are any parts dishwasher-safe?
- Does the manual warn against dishwashers?
- Are there seams where meat can hide?
- Can you reach the inside of the grinder head?
- Does the blade require special handling?
- Are parts easy to dry fully?
Cleaning and sanitizing are not the same thing. Cleaning removes visible debris and residue; sanitizing reduces microorganisms after cleaning. NSF’s food-processing sanitation guidance emphasizes removing debris, rinsing, applying detergent with scrubbing, rinsing again, inspecting, and then sanitizing or disinfecting as separate steps. (nsf.org)
For home use, follow your grinder manual first. In general, the practical flow is:
- Unplug the grinder.
- Disassemble the grinder head.
- Remove meat and fat residue.
- Wash removable food-contact parts with hot, soapy water unless the manual says otherwise.
- Scrub holes in the plate carefully.
- Rinse thoroughly.
- Sanitize according to food-safe sanitizer directions if appropriate for the material.
- Dry completely.
- Lightly oil carbon steel parts if recommended by the manufacturer.
- Store plates and blades where they stay dry and protected.
Do not assume every grinder part belongs in the dishwasher. Read the manual. Some parts can dull, discolor, corrode, or lose finish.
Step 8: Put Safety at the Center
A meat grinder is powerful enough to pull meat through a blade. Treat it with respect.
Important safety habits:
- Always use the supplied food pusher.
- Never put fingers into the feed tube.
- Never use spoons, knives, chopsticks, or improvised tools to push meat down.
- Keep loose sleeves, towels, and jewelry away from moving parts.
- Unplug before assembling, disassembling, or cleaning.
- Do not reach toward the plate while the grinder is running.
- Stop the machine before clearing a clog.
- Keep children away from the machine during use.
Manufacturer manuals commonly warn users to feed meat with the provided pusher and not with fingers or other objects; for example, a Vollrath electric grinder manual identifies the feed chute as an entanglement hazard and instructs users to use only the provided food pusher. (partstown.com)
Good grinders make safe behavior easy. The pusher should fit the feed tube well. The on/off switch should be easy to reach. The machine should sit stable on the counter. The feed tray should not wobble.
If a grinder feels unsafe during a dry run, do not assume it will feel better when loaded with slippery meat.
Step 9: Plan Your Food Safety Workflow
Home grinding gives you control over meat cuts, fat ratio, freshness, and texture. It also gives you responsibility.
When meat is ground, more surface area is exposed, and any bacteria on the surface can be distributed throughout the mixture. That is why food safety matters so much with ground meat.
Keep these habits in place:
- Keep meat cold before grinding.
- Chill grinder parts when helpful.
- Work in small batches.
- Return ground meat to the refrigerator quickly.
- Clean surfaces before and after grinding.
- Avoid cross-contamination with ready-to-eat foods.
- Cook ground meat to safe temperatures.
USDA FSIS advises keeping ground beef refrigerated at 40°F or below and using it within one to two days; it also warns not to leave ground beef or other perishable food at room temperature for more than two hours, or more than one hour when temperatures are above 90°F. (fsis.usda.gov)
For cooking, USDA FSIS states that raw ground beef, pork, lamb, and veal should reach an internal temperature of 160°F, measured with a food thermometer. (ask.fsis.usda.gov)
These numbers are not decoration. They are part of the workflow.
Step 10: Choose Accessories You Will Actually Use
Many grinders come with accessories. Some are valuable. Some will live in a drawer forever.
Useful accessories include:
- Fine plate
- Medium plate
- Coarse plate
- Sharp replacement blade
- Sausage stuffing tubes
- Stuffing plate
- Food pusher
- Large meat tray
- Cleaning brush
- Storage case or organizer
Nice but not always essential:
- Multiple sausage tube sizes
- Burger press
- Kibbeh attachment
- Specialty plates
- Foot switch
- Extra-large tray
If you are new, prioritize the core set:
- One coarse plate
- One medium or fine plate
- One sharp blade
- One pusher
- One tray
- Clear instructions
For sausage makers, add:
- Stuffing tubes
- Stuffing plate
- Reliable reverse function
- Larger tray
- Better motor strength
For hunters or bulk processors, add:
- Extra plates
- Extra blades
- Parts storage
- Heavy-duty motor
- Stronger construction
- Repair support
A grinder with fewer but better accessories is often wiser than a box full of flimsy extras.
Step 11: Test the Countertop Experience
This is the part many buyers skip.
Imagine the full session, not just the purchase.
You need space for:
- Trimmed meat
- A chilled bowl for incoming grind
- The grinder body
- The tray
- The cord
- A cutting board
- A scale, if you measure fat ratios
- Seasonings, if making sausage
- Cleaning supplies afterward
Ask:
- Will the grinder fit under cabinets?
- Is the tray high enough to feed comfortably?
- Is the switch on the front, side, or back?
- Does the machine slide while running?
- Is the cord long enough?
- Can I move it safely when assembled?
- Where will I put hot, soapy parts after cleaning?
This is humble, practical wisdom: the best meat grinder is not just the best machine. It is the machine you can use without turning your kitchen into an obstacle course.
Step 12: Build a Simple Buying Scorecard
Since we are avoiding comparison-table chaos, use a simple list. For each grinder you are considering, score it from 1 to 5 in the following areas:
- Batch size fit
- Motor strength for your use
- Plate options
- Blade and plate replacement availability
- Ease of assembly
- Ease of cleaning
- Material quality
- Storage practicality
- Safety features
- Warranty and support
- Reviews from people with your use case
- Overall value
Then ask one final question:
Would I still want to use this grinder after a long day?
If the answer is no, keep looking.
Tutorial: How to Choose Your Grinder in 20 Minutes
Now let us turn all the advice into a quick decision process.
Minute 1 to 3: Name your main use
Write down your primary reason for buying a grinder.
Examples:
- I want better burgers.
- I want to make breakfast sausage.
- I want to process venison.
- I want to control ingredients in ground meat.
- I want a commercial prep tool.
- I want to experiment with texture.
If you have multiple reasons, choose the one that matters most.
Minute 4 to 6: Estimate your batch size
Choose your normal batch:
- Small: one to three pounds
- Medium: four to ten pounds
- Large: more than ten pounds
- Bulk: seasonal or commercial processing
Do not exaggerate. Honest batch size saves money.
Minute 7 to 9: Choose your type
Use this guide:
- Small and occasional: manual grinder or stand mixer attachment
- Small but frequent: compact electric grinder
- Medium and regular: dedicated electric grinder
- Large or seasonal: heavy-duty electric grinder
- Business use: commercial-grade certified equipment where required
Minute 10 to 12: Choose plate needs
For burgers and meatballs:
- Medium plate
- Optional coarse plate for first pass
For sausage:
- Coarse plate
- Medium or fine plate
- Stuffing accessories
For chili:
- Coarse plate
For smooth textures:
- Fine plate
- Stronger motor or smaller batches
Minute 13 to 15: Check cleaning reality
Look at photos and manuals if available.
Reject a grinder if:
- You cannot tell how it disassembles
- Food-contact parts look hard to clean
- Replacement parts are impossible to find
- Reviews repeatedly mention corrosion, smearing, or stuck parts
- The manual is unclear about cleaning
Minute 16 to 18: Check safety and support
Look for:
- A proper food pusher
- Stable feet
- Clear controls
- Reverse function for electric models
- Accessible manual
- Replacement plates and blades
- Warranty terms
- Customer support
Minute 19 to 20: Make the choice
Pick the grinder that best matches your actual usage, not the one with the loudest marketing.
Your final sentence should sound like this:
I am choosing this grinder because it fits my batch size, has the plates I need, is safe to operate, can be cleaned thoroughly, and has replacement parts available.
That is confident buying.
First-Use Walkthrough: Your Practice Grind
Once your grinder arrives, do a practice session before your big project.
Do not make your first grind a holiday sausage marathon. Start with a small burger batch. Learn the machine when the stakes are low.
1. Read the manual
Yes, actually read it. You want to know:
- Which parts are washable
- Which parts are dishwasher-safe, if any
- How the blade faces
- How tightly to secure the retaining ring
- Whether parts need oiling
- How long the motor can run continuously
- What foods are not recommended
2. Wash food-contact parts
Wash removable food-contact parts before first use according to the manual. Dry everything completely.
3. Chill the meat
Cold meat cuts cleanly. Warm meat smears.
Cut meat into strips or cubes that fit easily into the feed tube. Spread the pieces on a tray and chill until firm but not frozen solid unless your manual specifically allows frozen meat.
4. Chill the grinder parts
For better texture, chill the grinder head, auger, blade, and plate if your materials allow it. Cold metal helps keep fat firm.
5. Assemble carefully
Typical assembly order is:
- Grinder head
- Auger
- Blade
- Plate
- Retaining ring
- Tray
- Pusher
The blade must face the correct direction. If the flat cutting side is not seated against the plate, the grinder may mash rather than cut.
6. Place a cold bowl under the outlet
Use a bowl that gives the ground meat room to fall loosely. If you are grinding a larger batch, set that bowl over ice.
7. Feed steadily, not aggressively
Turn on the grinder before adding meat unless your manual says otherwise. Feed pieces gradually. Use the pusher only to guide the meat. Do not ram.
If the grinder is struggling, stop and check the cause. More force is rarely the answer.
8. Inspect the grind
Good grind looks distinct. You should see strands or pieces, not paste.
If it looks smeared:
- Meat may be too warm
- Fat may be too soft
- Blade may be dull
- Plate may be clogged
- Ring may be too loose or too tight
- Meat may have too much sinew
9. Chill before a second pass
If you plan to grind twice, chill the first grind before sending it through again. This keeps fat from melting and helps the second pass stay clean.
10. Clean immediately
Do not let meat dry inside the grinder. Unplug, disassemble, clean, rinse, sanitize if appropriate, dry, and store.
This first session teaches you more than any product listing can.
Practical Grinding Tips for Better Texture
Here are the grinding tips that separate clean, bouncy, beautiful ground meat from sad meat paste.
Keep everything cold
Cold is your best friend. Meat, fat, blade, plate, and bowl all benefit from staying chilled.
If the fat starts looking shiny or greasy, pause and chill.
Trim smart, not obsessively
Remove tough silver skin, heavy sinew, and gristle. Leave flavorful fat if it belongs in the recipe. The grinder can handle meat and fat, but it is not a miracle worker for connective tissue.
Cut meat to fit the feed tube
Pieces should slide in easily. If you must shove hard from the start, your pieces are too large or too warm.
Use the coarse plate first
For many recipes, especially sausage or double-ground burger blends, the coarse plate is a helpful first pass.
Do not overtighten the ring
The retaining ring should hold the plate and blade securely, but overtightening can increase friction. Follow the manual.
Watch the fat
If fat smears, texture suffers. Chill the meat again.
Mix after grinding when possible
For burgers, handle gently. For sausage, mix until the protein binds according to the recipe. Different foods need different handling.
Clean the plate holes
A clogged plate creates pressure and smearing. Stop and clean it if the output changes.
Sharpen or replace dull parts
Dull blades are a common cause of poor results. If your grinder once worked well and now mashes, inspect the blade and plate.
Do not ignore sound
A grinder has a normal working sound. Straining, grinding, clicking, or sudden pitch changes deserve attention.
Common Buying Mistakes
Mistake 1: Buying for horsepower alone
Power helps, but cutting quality, plate fit, feed design, and cooling matter too.
Mistake 2: Ignoring cleanup
If cleanup is awful, you will not use the grinder often. Ease of cleaning is a performance feature.
Mistake 3: Choosing too small for bulk work
A small unit may handle a few pounds beautifully and then become frustrating during a bigger project.
Mistake 4: Buying accessories instead of capability
A box full of attachments does not matter if the grinder cannot maintain a clean cut.
Mistake 5: Forgetting replacement parts
Blades dull. Plates wear. Tubes crack. Pushers disappear. Choose a grinder with parts support.
Mistake 6: Treating sausage stuffing as an afterthought
A grinder can stuff sausage, but not every grinder does it gracefully. If sausage is your main goal, make sure the grinder and accessories are suited to that task.
Mistake 7: Not checking storage
A heavy grinder is wonderful on grinding day and annoying every other day if you have nowhere to put it.
Troubleshooting: What Your Grinder Is Telling You
The meat is mushy
Likely causes:
- Meat is too warm
- Fat is melting
- Blade is dull
- Plate is clogged
- Meat was overworked
Fix:
- Chill meat and parts
- Clean the plate
- Inspect blade orientation
- Use a coarser plate first
- Replace or sharpen blade if needed
Meat backs up in the feed tube
Likely causes:
- Pieces are too large
- Sinew is wrapping around the blade
- Plate is clogged
- Motor is overloaded
Fix:
- Stop and unplug
- Disassemble and clear the grinder
- Trim sinew
- Cut smaller pieces
- Work in smaller batches
The grinder gets hot
Likely causes:
- Running too long
- Too much resistance
- Dull blade
- Fine plate used too soon
- Meat too warm
Fix:
- Pause and let the machine cool
- Chill meat again
- Use a coarse first pass
- Check blade and plate
- Follow duty-cycle guidance in the manual
The grind is uneven
Likely causes:
- Inconsistent meat size
- Uneven chilling
- Loose plate or ring
- Dull blade
Fix:
- Cut uniform pieces
- Chill evenly
- Reassemble carefully
- Inspect cutting parts
The machine smells like overheating
Stop immediately. Unplug it. Let it cool. Check the manual before continuing. If the smell persists, contact the manufacturer or a qualified service provider.
How to Know When It Is Worth Upgrading
Your first grinder may not be your forever grinder. That is fine. Tools teach you what you value.
Upgrade when:
- Your normal batch takes too long
- The grinder overheats often
- You dread using it
- You are making sausage more frequently
- Parts are wearing out and replacements are unavailable
- You need a larger feed tray
- You need better texture consistency
- You process game or bulk meat seasonally
Do not upgrade just because a bigger model exists. Upgrade when your current grinder is the bottleneck.
The Final Buying Checklist
Before you click buy, run through this list:
- My batch size matches the grinder capacity.
- The grinder type fits my kitchen and workload.
- The motor and gears suit my expected use.
- The included plates match the textures I want.
- Replacement blades and plates are available.
- The food-contact parts are cleanable.
- The manual is accessible and clear.
- The grinder includes a proper pusher.
- The unit will fit my counter and storage space.
- I understand which parts are dishwasher-safe, if any.
- I know how to chill, grind, clean, and store safely.
- Commercial certification needs are addressed if I am buying for business use.
- Reviews support my specific use case, not just general popularity.
If a grinder passes this checklist, you are no longer guessing. You are choosing.
A Simple Recommendation Framework
Still deciding? Use this plain-language guide.
Choose a manual grinder if:
- You want low cost
- You grind rarely
- You enjoy hand-powered tools
- You are making very small batches
Choose a stand mixer attachment if:
- You already own the mixer
- You want to save space
- You are experimenting
- You grind occasionally
Choose a compact electric grinder if:
- You make burgers or meatballs at home
- You want convenience
- You process small to medium batches
- You want better speed than manual grinding
Choose a heavy-duty electric grinder if:
- You make sausage often
- You process game
- You grind larger batches
- You want durability and speed
Choose a commercial-style grinder if:
- You operate in a food business
- You grind frequently and heavily
- You need compliance-ready equipment
- You value serviceability and long-term support
The best meat grinder is the one that makes your most common task easier, safer, and more repeatable.
Final Guru Advice
A meat grinder rewards the cook who thinks ahead.
Choose the right size. Keep the meat cold. Use the right plate. Respect the blade. Clean immediately. Cook ground meats safely. Store parts dry. Replace dull pieces before they ruin your texture.
That is the whole craft in miniature.
You do not need the most expensive machine to grind well. You need a grinder that fits your kitchen, a process you can repeat, and a little patience the first time through.
Master those basics, and every burger, sausage, meatball, chili, and custom blend becomes more intentional. That is the real pleasure of owning a grinder: not just doing the work yourself, but knowing exactly why the result is better.
