
The custom apparel decoration industry is in the midst of a massive technological shift, and at the heart of this revolution is the direct to film printer. Whether you are an established print shop owner looking to expand your capabilities or an ambitious entrepreneur planning to launch a custom t-shirt brand, you have likely heard the massive buzz surrounding this technology. Find out the best info about direct to film printer.
Direct to film (DTF) technology has rapidly transformed how we think about transferring vibrant, high-quality, and durable designs onto various fabrics. It bridges the gaps left by traditional methods like screen printing, embroidery, and sublimation, offering a versatile, cost-effective, and user-friendly solution.
In this comprehensive guide, we will dive deep into everything you need to know about this game-changing technology. From understanding the core advantages and comparing it to other printing methods, to mastering maintenance and scaling your business, this ultimate guide will equip you with the knowledge to succeed.
What is Direct to Film Printing?
At its core, direct to film is exactly what it sounds like. Instead of printing a design directly onto a garment, you use a specialized dtf printer to print your design onto a special transparent PET (Polyethylene Terephthalate) film.
Once the design is printed, a specialized adhesive powder is applied to the wet ink. This powder is then melted (cured) using heat. The final result is a custom, fully prepared heat transfer that can be stored for months or immediately pressed onto a garment using a standard heat press.
The Four Pillars of the DTF Process
To truly understand the advantages of a direct to film printer, you must first understand the four essential components that make the magic happen:
- The Printer and Inks: Specialized printers lay down highly flexible CMYK (Cyan, Magenta, Yellow, Black) inks, followed by a bright white underbase.
- The PET Film: A specially coated transparent film that holds the ink without letting it spread or bleed.
- The Adhesive Powder: A granular thermoplastic polyurethane (TPU) powder that sticks to the wet ink and acts as the glue between the design and the fabric.
- Heat and Pressure: Used to cure the powder onto the film and subsequently press the design onto the final substrate.
The Core Advantages of Direct to Film Printing
Why is everyone rushing to buy a dtf printer? The advantages are numerous and address many of the pain points that decorators have faced for decades.
1. Unmatched Fabric Versatility
Traditional printing methods are notoriously picky about fabrics. Sublimation requires a high polyester count. Direct to Garment (DTG) demands high cotton content. DTF, on the other hand, is the ultimate peacemaker. Because the design is bonded to the fabric using a melted adhesive powder, DTF transfers can be applied to almost anything. You can confidently press DTF designs onto 100% cotton, 100% polyester, triblends, nylon, rayon, leather, canvas, and even treated woods.
2. No Garment Pre-treatment Required
If you have ever operated a DTG printer, you know the headache of pre-treatment. Spraying chemicals onto a shirt, pressing it dry, and hoping you applied the exact right amount to prevent the ink from washing out is a tedious, messy process. DTF completely eliminates the need for fabric pre-treatment, saving you incredible amounts of time, money, and labor.
3. Exceptional Durability and Washability
A common concern for newcomers is the washability of dtf transfers. Will it peel? Will it crack like old-school iron-on vinyl? When applied correctly, DTF transfers boast incredible durability. The TPU adhesive powder creates a strong, flexible bond with the fabric’s fibers. High-quality DTF transfers can easily withstand 50 to 100 heavy wash cycles without significant fading, cracking, or peeling, provided they are washed inside out in cold water. They stretch naturally with the garment and rebound perfectly.
4. Vibrant Colors and Fine Details
Because the ink is printed onto a specialized non-porous film rather than directly onto highly absorbent fabric fibers, the ink droplets remain perfectly crisp. This allows a direct to film printer to produce incredibly fine details, sharp text, and photorealistic gradients that pop beautifully, regardless of the garment’s color.
How Does DTF Compare to Traditional Methods?
To truly grasp the value of DTF, we have to look at how it stacks up against the competition.
DTF vs Direct to Garment Printing (DTG)
The debate of dtf vs direct to garment printing is one of the most common in the industry.
- Fabric Constraints: DTG requires 100% cotton or high-cotton blends. DTF works on nearly everything.
- Pre-treatment: DTG requires chemical pre-treatment for dark garments; DTF requires none.
- Feel (Hand): DTG inks sink directly into the fabric, providing an incredibly soft, almost unnoticeable feel (especially on light garments). DTF has a slight “hand” or feel to it since it sits on top of the fabric. However, modern DTF feels remarkably soft, much lighter than vinyl or heavy plastisol screen prints.
- Speed: Printing a batch of DTF transfers on a roll-to-roll printer is significantly faster than loading individual shirts into a DTG machine.
Sublimation vs DTF for Cotton
Sublimation is fantastic—if you want to print on white, 100% polyester shirts. The sublimation process turns ink into a gas that dyes polyester fibers. When looking at sublimation vs dtf for cotton, the winner is clear. Sublimation physically cannot bond to natural cotton fibers; the ink will simply wash out in the first laundry cycle. If you want to print vibrant, full-color designs on dark fabrics or anything containing cotton, a dtf printer is the vastly superior choice.
DTF vs Screen Printing
Screen printing remains the king of bulk orders (e.g., 500 identical shirts for a marathon). However, for short runs, complex multi-color artwork, or print-on-demand fulfillment, screen printing’s setup times and color limitations make it cost-prohibitive. DTF allows you to print a single full-color shirt just as easily and cost-effectively as 100 shirts.
Building Your Arsenal: Essential DTF Equipment
If you are ready to make the leap, you need to know what equipment is involved. Choosing the best dtf setup for beginners can feel overwhelming, but breaking it down into categories helps clarify the process.
1. The Direct to Film Printer
There are generally two routes you can take:
- Desktop Conversions: These are usually standard Epson photo printers (like the L1800) modified to run DTF inks. They are incredibly affordable but require a lot of tinkering, patience, and daily maintenance. They are great for hobbyists but can be frustrating for high-volume businesses.
- Purpose-Built Commercial Roll-to-Roll Printers: These machines are built from the ground up for DTF. They feature dual printheads (one for CMYK, one for White ink), advanced mainboards, and roll-feeders. They are the standard for serious businesses.
2. High-Quality DTF Inks
Not all inks are created equal. You must ensure pigmented textile ink compatibility with your specific printhead (such as Epson i3200 or XP600 heads). Using cheap, incompatible inks is the fastest way to permanently clog a printhead and ruin your machine. Always source your CMYK and White inks from reputable dealers who test their inks for high elasticity and colorfastness.
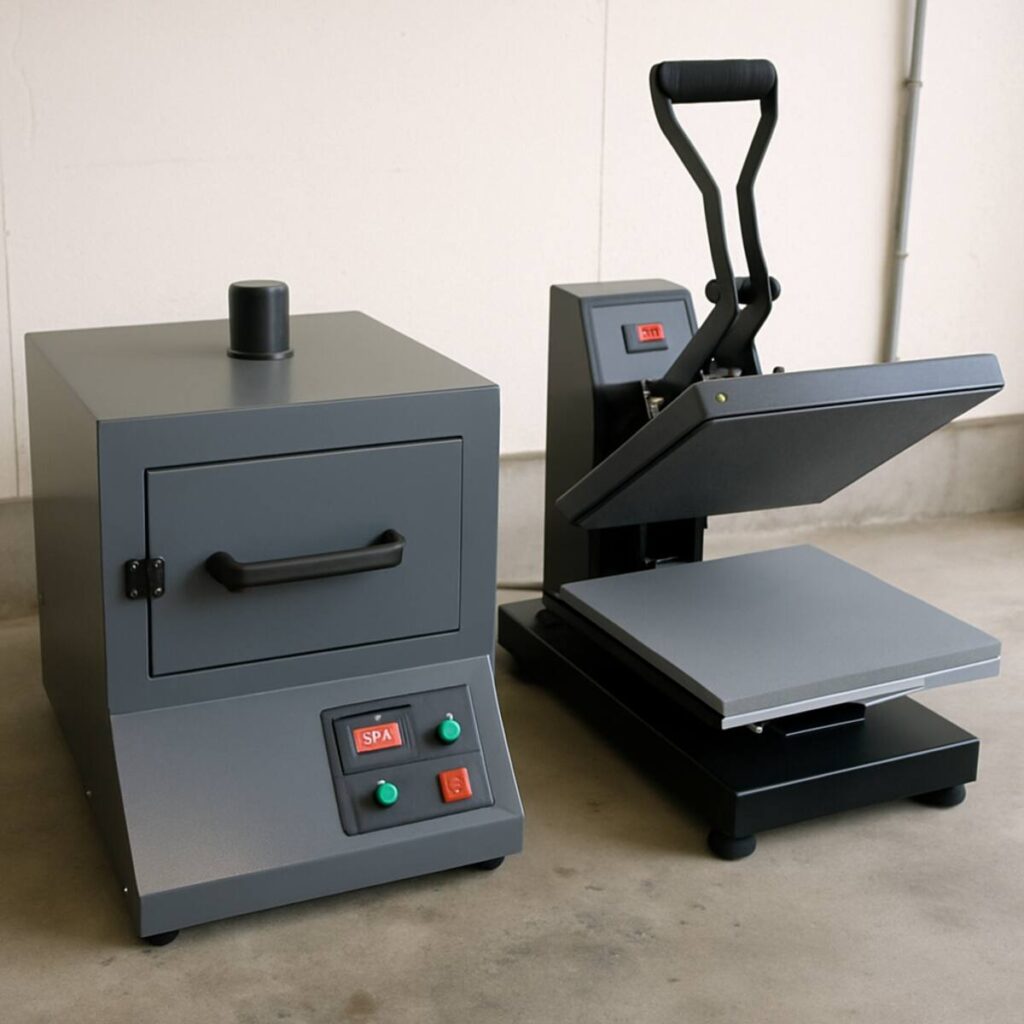
3. Curing Equipment
Once the adhesive powder is applied to the wet ink, it must be melted. When deciding between a dtf curing oven vs heat gun, always opt for an oven if your budget allows. A heat gun is very cheap but wildly inconsistent; it’s easy to accidentally burn the film or under-cure the powder, leading to failed transfers. A dedicated DTF curing oven provides even, consistent, and controlled heat across the entire transfer, ensuring the powder turns into an even, glossy, orange-peel-like texture.
For high-volume setups, businesses use an automated powder shaker and conveyor dryer unit that attaches directly to the printer, completely automating the powdering and curing process.
4. A Reliable Heat Press
Your heat press is just as vital as your printer. You need a press that provides exceptionally even heat and pressure across the entire platen. Cheap heat presses often have cold spots, which will cause your DTF transfers to peel away from the shirt after washing.
Step-by-Step Guide: How to Use DTF Transfer Film
Understanding the workflow is crucial for efficiency and quality control. Here is a detailed, actionable breakdown of how to use dtf transfer film from screen to shirt.
Step 1: Designing and Ripping
Create your design in software like Adobe Illustrator or Photoshop. Save it as a high-resolution PNG with a transparent background. Import this file into your DTF RIP (Raster Image Processor) software. The RIP software is the brain of the operation. It tells the printer how much CMYK ink to lay down and, crucially, generates a white ink “choke.” This ensures the white underbase stays slightly inside the edges of the color ink, preventing a white halo around your design.
Step 2: Printing on the Film
Load your PET film into the printer. Be sure you are printing on the correct side (the coated, slightly matte side, not the glossy back). The printer will first lay down the CMYK colors, and then immediately print a layer of white ink directly on top of the wet colors.
Step 3: Applying Hot Melt Adhesive Powder
While the white ink is still wet, it’s time for applying hot melt adhesive powder.
- Manual Method: Place the printed film in a large plastic bin. Sprinkle a generous amount of powder over the wet ink. Gently rock the bin back and forth so the powder coats every pixel of white ink. Finally, flick the back of the film firmly to knock off all excess powder from the unprinted areas.
- Automated Method: A roll-to-roll automated shaker does all of this for you, passing the film through a powder bath and vibrating the excess off automatically.
Step 4: Curing the Powder
Place the powdered film into your curing oven. Typically, curing takes about 2 to 3 minutes at 230°F to 260°F (110°C to 125°C), depending on your specific powder and oven. You will know it is ready when the powder has melted from a granular, sugar-like look to a smooth, glossy, slightly textured finish.
Step 5: Pressing the Garment
Pre-press your empty garment for 3–5 seconds to remove wrinkles and moisture. Position your cured DTF transfer on the shirt. The ideal heat press temperature for dtf transfers generally ranges from 300°F to 320°F (150°C to 160°C) with medium-to-firm pressure for 10 to 15 seconds. Always check your specific film manufacturer’s recommendations.
Step 6: Peeling the Film
This step requires knowing your materials: cold peel vs hot peel pet film.
- Cold Peel: You must remove the garment from the press and let it cool completely to room temperature before peeling the film away. Peeling too early will cause the ink to stretch and rip. Cold peel films generally offer the sharpest details and best washability.
- Hot Peel: These advanced films allow you to peel the film away within 1 to 3 seconds of opening the heat press. This massively speeds up production time and is favored by high-volume shops.
Actionable Tip: Regardless of whether you use hot or cold peel, always finish with a “post-press.” Place a sheet of Teflon or parchment paper over the exposed design and press it again for 5 seconds. This drives the ink deeper into the fabric fibers, enhancing durability and softening the feel.
Conquering Difficult Garments and Substrates
One of the greatest benefits of a direct to film printer is versatility, but that doesn’t mean every fabric behaves the same way.
The Challenge of Printing on Dark Polyester Shirts
Polyester is dyed using a process that activates with heat. When you apply a heat press to a dark polyester garment (especially red, navy, or black) at 320°F, the dyes in the fabric can turn back into a gas and seep up into your freshly pressed DTF transfer. This is known as “dye migration,” and it can turn a bright white logo into a muddy pink or dull grey overnight.
Printing on dark polyester shirts successfully requires a few specific techniques:
- Lower the Temp: Use a specialized low-temperature DTF adhesive powder that cures and presses at around 260°F to 275°F. This is usually below the threshold that triggers dye migration in polyester.
- Anti-Sublimation Powder: Some manufacturers sell black or grey adhesive powders. These powders contain activated carbon or blockers that act as a physical barrier, stopping the migrating dye from reaching your white underbase.
- Shorter Press Times: Minimize the amount of time the garment is exposed to extreme heat.
Navigating the Business Side of DTF
Understanding the technology is only half the battle; ensuring it makes financial sense is the other.
Calculating Startup Costs for DTF Business
If you are planning to launch, you need a realistic view of the startup costs for dtf business. While prices fluctuate, here is a general breakdown of what to expect for a professional, entry-level commercial setup:
- Commercial Roll-to-Roll Printer (with dual printheads): $2,500 – $5,000
- Automated Powder Shaker/Dryer: $1,000 – $2,500
- High-Quality Commercial Heat Press: $500 – $1,500
- RIP Software (often included, but if bought separately): $300 – $600
- Initial Consumables (Inks, Roll of Film, Powder): $300 – $500
- Fume Extractor/Ventilation (Crucial for safety): $300 – $800
Total Estimated Commercial Startup Cost: $4,900 – $10,900
Note on desktop conversions: You can technically start a desktop conversion setup for under $1,500. However, the loss of time dealing with clogs and manual powdering often negates the initial financial savings if you are trying to fulfill daily commercial orders.
ROI and Profit Margins
The cost to produce a standard 10×10 inch DTF transfer (including film, ink, and powder) is incredibly low—often between $0.50 and $1.00 per print. If you purchase a blank t-shirt wholesale for $3.00, your total cost of goods sold (COGS) is roughly $4.00. Selling that custom shirt for $20.00 to $25.00 yields a fantastic gross margin. Furthermore, you can sell the transfers themselves directly to other crafters and businesses, opening up a lucrative secondary revenue stream.
Crucial Maintenance for Your DTF Printer
If there is one undeniable truth about owning a dtf printer, it is this: maintenance is not optional. The unique chemistry of the inks—specifically the white ink—requires strict daily routines.
Understanding White Ink Circulation System Benefits
White DTF ink gets its opacity from Titanium Dioxide (TiO2). This is a heavy mineral compound. If left sitting in lines or a tank, the titanium dioxide will act like sand in water; it will rapidly sink to the bottom, separate from the carrying fluid, and solidify. This will permanently clog your ink lines, dampers, and printheads.
To combat this, professional printers are equipped with specialized hardware. The white ink circulation system benefits cannot be overstated. These systems use a motorized pump to continuously pull white ink from the tank, circulate it through the ink lines right up to the dampers, and return it to the tank. This constant motion prevents the heavy pigments from settling. Additionally, the ink tanks usually feature motorized stirrers that mix the ink 24/7. When shopping for a printer, a robust white ink management system is non-negotiable.
Daily Maintenance for White Ink Printheads
Even with an automated circulation system, you must perform daily physical maintenance for white ink printheads.
- Environment is Key: DTF inks dry rapidly. Your printing room should be kept at 40% to 60% humidity and around 70°F (21°C). If the air is too dry, ink will dry on the microscopic nozzles of the printhead.
- Daily Shake: At the start of your day, gently agitate the white ink tank.
- Head Cleanings: Run a software-initiated head cleaning sequence to purge old ink.
- Nozzle Checks: Print a test pattern (nozzle check) every single day before you start printing production files. This ensures all nozzles are firing flawlessly.
- End of Day: Wipe the edges of the printhead and the capping station with specialized cleaning solution and a foam swab (never use cotton, as fibers will clog the head).
Troubleshooting DTF Ink Flow Issues
Even the most diligent operators will occasionally face problems. Here is a quick guide to troubleshooting dtf ink flow issues:
- Missing Nozzles on the White Ink:
- Cause: Air in the lines or dried ink on the head.
- Solution: Run a standard head cleaning. Check the capping station to ensure it is making a tight seal against the printhead. If the seal is loose, the pump cannot pull ink through the head.
- Ink Starvation (Prints start fine, then colors drop out):
- Cause: The printhead is drawing ink faster than it can be replenished.
- Solution: Check your ink dampers. Dampers have tiny internal filters that catch debris. Over time, these filters get clogged with coagulated ink. Replacing dampers every 3 to 6 months is standard preventative maintenance.
- Banding (Visible horizontal lines in the print):
- Cause: Usually related to printhead alignment, media feed calibration, or a partially clogged printhead.
- Solution: Run a nozzle check to rule out clogs. If the nozzles are perfect, recalibrate your printer’s step/feed settings in the RIP software to ensure the film is advancing exactly the right distance between print passes.
Expert Tips for Flawless DTF Transfers
To elevate your prints from amateur to professional, keep these actionable tips in mind:
- Proper Storage: Uncured PET film is sensitive to moisture. Store your blank film in its original packaging with silica gel packets. If the film absorbs humidity from the air, the ink will pool and run instead of sitting cleanly on the coating.
- Pre-Baking Film: If you suspect your film has absorbed moisture (e.g., you notice the ink is mottling or spreading), run the blank film under your heat press (hovering, not touching) for 10 seconds to bake the moisture out before printing.
- Powder Management: When applying powder, always ensure you are in a well-ventilated space and wearing a mask. The ultra-fine TPU powder can easily become airborne, and you do not want to inhale it.
- Ventilation: Curing DTF powder releases vapors. You absolutely must vent your curing oven to the outside or use a high-quality commercial fume extractor with HEPA and activated carbon filters.
Conclusion
The rise of the direct to film printer is not a passing fad; it is a fundamental shift in apparel decoration. By offering a solution that ignores fabric constraints, eliminates the messy pre-treatment process of DTG, and blows past the color limitations of screen printing, DTF empowers creators and business owners like never before.
While the learning curve—specifically mastering the RIP software and staying on top of printhead maintenance—requires dedication, the payoff is immense. You gain the ability to produce incredibly durable, vibrant, and soft-feeling custom apparel on demand.
By understanding the intricacies of everything from applying hot melt adhesive powder to managing your heat press temperature for dtf transfers, you are setting yourself up for success. Whether you are pressing onto bright white cotton or tackling the challenge of printing on dark polyester shirts, DTF technology gives you the versatility to say “Yes” to almost any customer request. Protect your investment through rigorous maintenance, respect the environmental needs of your inks, and watch your custom apparel business thrive in this exciting new era of printing.